Archive | DIY Ideas RSS feed for this section

How To DIY: Sewing a Trellis Patterned Pillow

9 Oct

What You’ll Need (measurements are for a 14×14 pillow):

  • 1 yard of Brown Cotton Fabric (cut into a 17×19 square – rest of the fabric will be used for the pattern)
  • 1/2 yard of Cream Cotton Fabric (cut into a 17×17 square)
  • Sewing machine
  • Chalk
  • Scissors
Steps:
1) Using chalk draw out the shape that you’ll want to sew onto your maine colored fabric. For this particular pillow I drew five shapes that were 8 inches tall and 7 inches wide. The reason you use chalk is because it will wash off easily with water, and doesn’t leave a permanent mark on the fabric.

2) Cut out the five shapes. If they aren’t completely even it’s okay, it will be fixed when you sew over the edges.

3) Map out how you want the pattern to look on the fabric:

4) Using safety pins, secure each pieces onto the larger fabric. This will ensure your pattern is easier to keep in place while you’re sewing the different pieces on. 

5) Sew all five pieces to the base fabric. You should use a tight zig zag stitch right on the edge of the brown fabric and have it overlap onto the cream fabric. Once you’ve sewn all five pieces, the reverse side should look something like this: (remember this is when your pillow is inside out).

6) Finish off the pillow by securing the back with a sleeve insert. Instructions for a sleeve pillow cover can be found here.

7) Flip the pillow right-side-out and insert your 14×14 inch pillow!

I am so excited about these throw pillows. And although they did take some time to finish, it was completely worth it! Stitching your own pattern makes the pillows look like you got them straight out of a designer store, but only costing 1/4 of the price!

DIY Bedroom Bench from Converted Coffee Table {Part II}

25 Sep

Here is a pic of what I started with, and the first post is here.

What you need:

  • Gray paint (or desired color)
  • Sponge brush
  • 4 Inch Foam that hangs about 1/2 inch over edge of coffee table (we found ours at JoAnn Fabrics)
  • Desired Fabric (I purchased 1 yard for a 36×18 bench)
  • Staple Gun
  • All-purpose permanent hold glue
Steps:
1.) Paint the legs of the coffee table and let dry thoroughly
2.) In a well ventilated area glue the foam to the top of the table and allow to dry for at least an hour (some glues require 24 hours to dry)

3.) Cut the fabric so that there is about 1 inch that hangs over the top of the table (this is what you’ll need to staple under the lip).

4.) Pull fabric tightly at one side and staple two staples; repeat on all four sides.  This will ensure that each side stays even when you secure all of the fabric. Finish stapling all sides of the fabric to the bench.

5.) To secure the corners, fold them in a 45 degree angle under the fabric hanging over on the shorter sides of the bench. The best way to think about this is like you’re wrapping a present.

Here’s the final product! I’m so happy with the color!

And the fabric looks fab against the red chest of drawers in the room!

As an added bonus there was left over fabric and I made an accent pillow for the bed. This fabric is Robert Allen, and can be found at JoAnn Fabrics.

{I Do} It Myself Pillows!

25 Sep

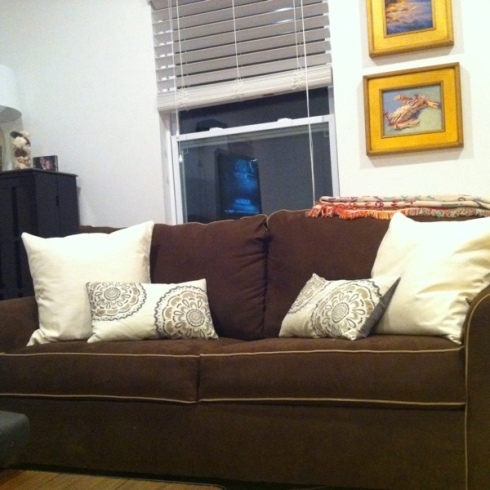
The Brother sewing machine has come in and I’ve spent the last week going sew crazy! I’ve wanted plain tan/beige pillows but in my search they were all over priced and I knew I could do it for less. So I headed to JoAnn fabrics and purchased standard canvas cotton fabric. For the pillows I did an open sleeve. Here are some photos of the process:

For a 18×18 Pillow follow this how to:

1. Cut a 20×20 square of fabric. Then cut a 23×23

2. Cut the 23×20 piece in to 13×20 and 10×20

3. Fold one end of the the 13×20 and of 10×20 one inch down.

4. Sew the folds on each piece.

5. Match up the ends of the larger piece of fabric (9×20) with the larger 20×20 piece. Sew along the three edges to seal.

6. Repeat step 5 with the 12×20 piece, creating the sleeve.

7. Flip the pillow cover right side out and put in your pillow insert.

Finished product:

On the couch! (sorry about the terrible pic! When I was done the sun was down and natural light wasn’t an option)

Tan-Accent-Pillows

Next up is the gorgeous coffee table turned bench with matching pillow!

DIY Bedroom Bench from Converted Coffee Table {Part I}

16 Sep

I mentioned a little bit ago that I had found a few great pieces in the warehouse Chris’ parents have. One of the items I came home with was a wooden coffee table. I’ve been wanting to do a DIY project and convert a table into a bench for the guest bedroom – and this piece was perfect!

This post will be done in phases, as it’s been raining the last few days and I haven’t had a chance to paint it yet – I’ve only sanded. I wanted to share the progress/process anyway:

Before:

After:

I really love the texture of the wood underneath the finish that was on it. It’s grainy so when I do a coat of paint it will look weathered and rustic.

My goal is to create something that is between these two looks:

Also, and I know this goes without saying, but always always always wear a mask when you’re sanding a piece of furniture. I thought I was wonder woman and didn’t wear one at first and my lungs punished me! Often the laminate or liquid finish on a piece of furniture is toxic and you don’t want to be breathing in the dust from it.


{Bedroom photo sources: houseofturquoise.com & decorpad.com}

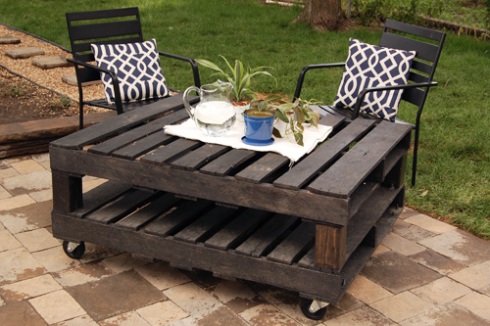
{I Do} DIY Outdoor Coffee Table

28 Jul

diy outdoor tables

I was playing on Pinterest last night and found a fab DIY project! Thanks to joy ever after blog for sharing this idea!

Get the steps they used here: DIY Outdoor Palette Table

If Chris and I end up doing this, we’ll definitely upload a few of our own tips on making it as well!

{I Do} It Ourselves? Free DIY Furniture Plans for PB Bar Cart

5 Jul

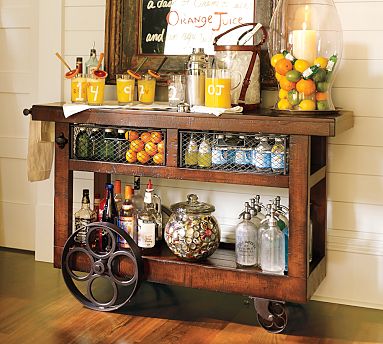
While browsing for indoor bar stations, I came across the following piece at Pottery Barn:

Glasgow Entertaining Bar

After realizing the piece is no longer available I began my search for its duplicate, used version, or something that could fill my need for this bar cart. In my search I came across a fabulous site, thedesignconfidential.com. Listed on the site is a DIY for building it!


Now, I’ll confess, it will be a task, but Chris has agreed to take on the challenge with me. Wish us luck – I’ll be uploading pics of the full experience, along with any tips we discover.

For details and the how-to go here: Free DIY Furniture Plans to Build a PotteryBarn Inspired Glasgow Entertaining Bar Cart | The Design Confidential.

DIY {I Do}: Painted Dresser as Kitchen Island

14 May

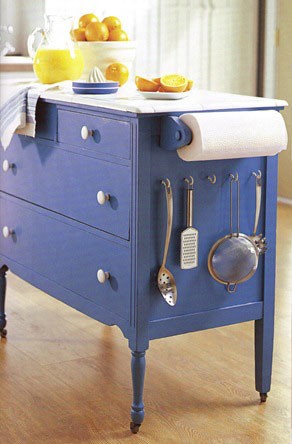
Love this idea, and how simple it actually is with a coat of paint and a few extra add-ons.

diy kitchen storage ideas
{From: apartmenttherapy.com}

So here’s how it’s done for less than $200!

{Paper Towel Holder from Sears: $9.59, Ikea Dresser: $129, Hooks: $8}

I know this one doesn’t have a granite counter top, but in order to keep is on the cheap side, you can always keep the white top and stain it with a cutting board stain.

{I Do} Utilizing Frames for Decor

10 May

French Larkspur eclectic bedroomFrench Larkspur

{I Don’t} Want to Spend $500 on Entryway Furniture

1 Apr

The beginning of my DIY project for our entryway stand. I want it to have 4 hooks, a bench with cushions and baskets under the bench. Here’s where I’ve started:

Now I need to find baskets and cushions. Oh and the wall color…more to come!

{I Do} Want to Build a Fire Pit

31 Mar

We are in the market for a fire-pit. The one above is around $150. My idea is to buy the cheapest one we can find, and then buy stones to place around it to give it a more full look.

Home Depot Fire Pit

End idea would look something like this:

Do It Yourself Fire Pits

You’ll probably see many more ideas before we make our purchase, but this is one of the first big things we want to install. I’m excited!

{Photo Credits: HomeDepot.com and Amazon.com}